The Cold Snap Buttercream Clinic: Rescuing Split Frosting in a British Winter Kitchen
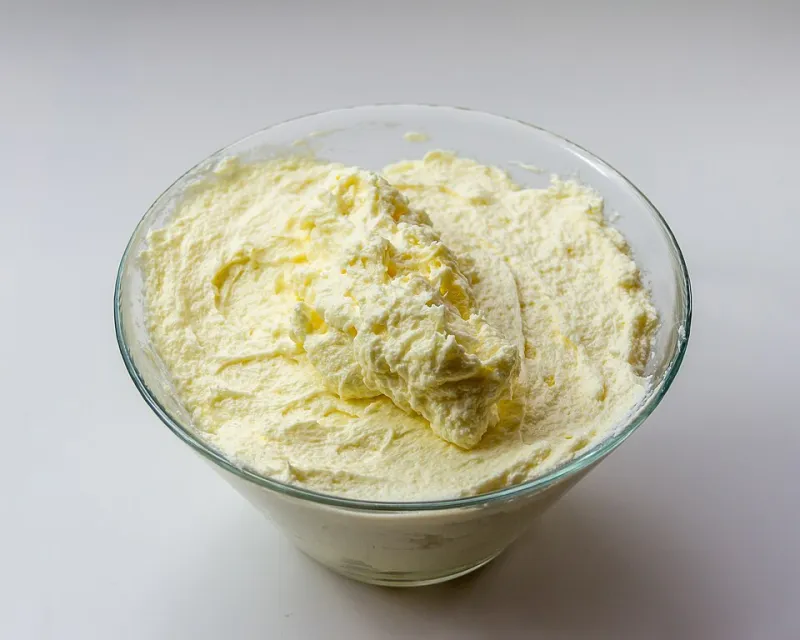
Photo: Raimond Spekking, CC BY-SA 4.0, via Wikimedia Commons
November in a British kitchen is a study in contrasts. The radiator is on, the window is cracked for steam, and the butter you left out at 8am is still a stubborn brick at 4pm. You set to work on a batch of buttercream, add the icing sugar, and watch in horror as it turns into a grainy, curdled mess. Take heart: this is not a baking failure. It is a temperature problem, and it is almost always fixable.
Why cold buttercream splits (and why it isn't your fault)
Buttercream is an emulsion. In simple terms, tiny droplets of water and fat are holding hands in a happy suspension, and the whole thing only works when the butter is soft enough to blend but cool enough to hold its shape. When the butter is too cold, it refuses to merge with the liquid and sugar. The mixture curdles, looks scrambled, and feels like it has separated into greasy little pebbles. It hasn't burned, and it isn't ruined. It is just too chilly to cooperate.
The same thing happens with ganache that has been made in a cold bowl, and with fondant that has been stored in a draughty cupboard. British kitchens in winter are not usually 21°C showrooms. They are rooms with a back door that lets in a breeze, a boiler that clicks on and off, and a worktop that feels like slate. Once you know that, you can stop blaming your whisk and start managing the temperature.
Test your kitchen before you bake
A digital thermometer is the cheapest bit of cake kit you will buy this winter. Stick one on the worktop and leave it for ten minutes. Most buttercream recipes behave best somewhere between 18°C and 20°C. If your kitchen is sitting at 15°C, you are effectively asking butter to cream in a fridge.
There is also a useful touch test. Press a finger into the softened butter: it should yield easily but still feel cool, not slippery or melty. If it dents only under real pressure, it is too cold. If it slumps and shines, it is too warm. The same goes for your mixing bowl. A stainless steel bowl straight from a cold cupboard will chill the butter on contact. Run it under warm water, dry it thoroughly, and start again.
Don't be tempted to microwave cold butter on a whim. It heats from the outside in, so you end up with a molten puddle around a hard core. Instead, cut the butter into small cubes and leave it in a warm spot for 20 to 30 minutes. Near — but not on — a radiator is fine. A sunny windowsill in November is not.
Three gentle rescues for a split buttercream
First, warm the bowl. Fill a larger bowl with hot tap water, sit your mixing bowl inside it for 30 seconds, then dry the base and beat again. Repeat in short bursts. The goal is to take the chill off, not to melt the butter.
Second, add a spoonful of warm cream or milk. Use double cream if you have it, warmed for a few seconds in a jug. Beat it in on a low speed. The extra liquid and gentle warmth can coax the emulsion back together. Add more icing sugar only as a last resort, because too much sugar makes the frosting heavy and gritty.
Third, use a warm whisk. Dip the whisk in hot water, dry it, and beat for a few seconds. A hairdryer on a low warm setting, held well away from the bowl and moved constantly, can also work — but keep it brief. You are trying to relax the butter, not melt it into soup.
The fridge condensation trap
Here is the classic winter decorating mistake. You chill a crumb-coated cake in the fridge, then bring it into a warm kitchen to finish decorating. Within minutes, beads of water appear on the surface. That is condensation, and it will make your buttercream slide, your ganache dull, and your fondant sticky.
Instead, leave the cake wrapped in the fridge for 20 to 30 minutes to come down gently, then unwrap it in the coolest spot in the kitchen. If you see condensation, don't wipe it with your hand. Let the cake rest and the moisture will settle. Work quickly, and keep the bowl of buttercream over a bowl of warm water if it starts to stiffen.
A winter cheat sheet for buttercream, ganache and fondant
| Frosting or covering | Ideal room temperature | Cold warning signs | Rescue move |
|---|---|---|---|
| Buttercream | 18–20°C | Grainy, curdled, stiff, greasy | Warm the bowl, add warm cream, beat slowly |
| Ganache | 20–22°C | Dull, thick, split, oily | Brief warmth, stir gently, add warm cream |
| Fondant | 18–20°C | Cracks, tears, sticky surface | Knead in warmth, use a little cornflour |
Decorating in a cold snap: practical habits
Work in small batches so the buttercream doesn't sit and chill while you pipe. Keep your piping bag warm between uses by resting it on a folded tea towel near the hob, never directly on a heat source. If you are making a layer cake, assemble it in the warmest room of the house and return it to the fridge only until the frosting is firm. And if the kitchen is really cold, give yourself permission to turn on the oven for ten minutes, then switch it off and use the residual warmth. It is not cheating; it is cake science.
The bottom line is simple: cold buttercream is a cry for warmth and a bit of patience. Test the room, warm the bowl, add liquid sparingly, and avoid the condensation trap. Your frosting will come back together, and your winter cakes will look every bit as polished as they do in July.